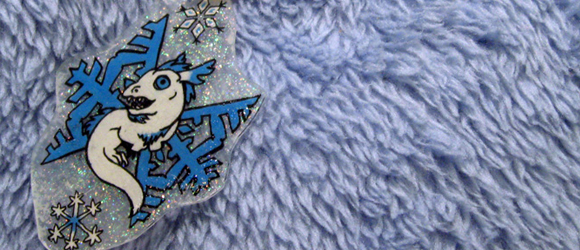
Shrinky Don’ts
- At June 21, 2013
- By sunhawk
- In Making Art
 0
0
As I’ve mentioned in other posts, I love to try different media and one of the more quirky ones I’ve tried and enjoyed is shrink plastic, most famously known by the brand name Shrinky Dinks. This plastic is meant to be drawn on, trimmed with scissors into some sort of shape, then heated to make the plastic shrink in size, usually to about 1/5 the size of the original drawing. Shrink plastic comes in sheets about the same size as normal paper, and it is either translucent or opaque with one side that’s been roughed up by sandpaper or the like.
Read More»How to Try New Media – Silicone Casting pt 5
- At June 14, 2013
- By sunhawk
- In How To - Guides
 0
0
With my mold ready to go, I poured the catalyst into the cup with silicone and then I started to use one of the house paint sticks, but quickly discovered that it was too big for the cup. As I was mixing, I realized I needed something thin and small enough to let me scrape around the sides of the cup so that all the silicone got mixed evenly. Suddenly I remembered that I had a few palette knives around, one of which was shaped more like a butter knife, so I grabbed that from my painting stuff and it turned out to be perfect for mixing.
Read More»How to Try New Media – Silicone Casting pt 4
- At June 07, 2013
- By sunhawk
- In How To - Guides
 0
0
So now that I had my mold all ready to go, the last thing to do before using it was to figure out how much silicone I would need for each bracelet. This time I wanted a slightly more accurate number, because I would be using far less silicone and thus far less catalyst, so if I was off in my numbers it would have a greater chance of impacting whether the bracelet would cure or not.
Read More»How to Try New Media – Silicone Casting pt 3
- At May 31, 2013
- By sunhawk
- In How To - Guides
 0
0
Now that I knew how much silicone to use, it was time to set up a work station to do the mixing and pouring of the silicone into the mold container. I used my garage because it was an area that would be left undisturbed for as long as it took the silicone to cure (to harden into a solid) and was somewhere that would allow any fumes to safely escape.
Read More»How to Try New Media – Silicone Casting pt 2
- At May 22, 2013
- By sunhawk
- In How To - Guides
 0
0
Based on my discussions with the salesperson at Sculpture Supply Canada, I purchased a few supplies and tools:
- Silicone + catalyst (needed to turn the silicone from a viscous liquid into a solid)
- Mold release (necessary to spray inside the mold so that my cuffs/bracelets would pop out later)
- Pigments to colour the silicone (both regular colours and UV-reactant colours)
- A DVD that went over the most common types of casting, including silicone casting
There were other tools that I needed for this project, but a number of them were more common household items that could be purchased at a local dollar store or hardware store for a much lower price than most art stores. And these tools and materials would come later, as there was a few steps that came up before I got to the casting stage.
Read More»


Get Social